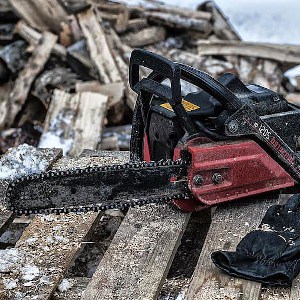
 Just because your chainsaw is a dirty tool that gets full of mud and grime does not mean it needs to stay ugly all the time. If your chainsaw is starting to look a little dingy, it may be time to do a full chainsaw cleaning. And if you want to know how to clean a chainsaw, you have come to the right place.
Today we are going to go step by step through exactly what you should do to get your chainsaw sparkling clean again. Even if your chainsaw is not overly disgusting, it could still use a cleaning. A good clean will make your chainsaw look fantastic, and it will make you feel good to use a tool that looks brand new. It will also increase the longevity of your tool, so you can use it for years without any repairs.
Prepare to Clean Your Chainsaw
Before we get into cleaning your chainsaw, make sure it does not have a power source. The last thing you want is accidentally starting your chainsaw while cleaning the chain. Because after that, you will be cleaning up a whole different kind of mess.
If you have a gas chainsaw, drain the fuel and disconnect the spark plug. Make sure there is no way it can accidentally start. If you are using a battery chainsaw, simply remove the battery and you will be safe. And if your electric chainsaw has a cord, make sure it is not plugged in.
Step 1: Clean the Bar
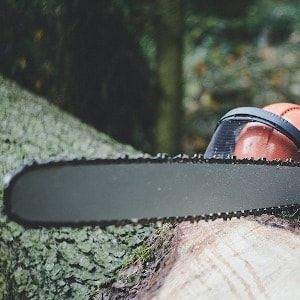 First, you need to take the bar off the chainsaw. Before doing this, make sure to disengage the chain brake, as this can make it extremely difficult to put everything back together later on. Get the cover off your chainsaw, then loosen and remove the bolts fixing the bar to the powerhead. Take the bar off, remove the chain, and place the chain out of the way.
This is going to depend on how dirty your bar is. If it is only a little dirty, you can probably use soap and water to scrub the dirt off with a rag. But if it is covered in serious gunk, I recommend using a degreaser solvent and a small tub to soak the bar in. Do this for about 30 minutes and then come back with a rag.
Once you have cleaned the bar itself, it is time to clean the guide bar groove. Any small cleaning tool will work to remove the gunk that has been sitting between the rails. Think of this like picking your teeth, you want to get the tool inside and remove all the small chunks of debris.
You can also use a small pick to get the gunk out of the oiler holes, or you can try blowing them with compressed air. You definitely want the oiler holes to be clean and free of gunk.
Step 2: Clean the Chain
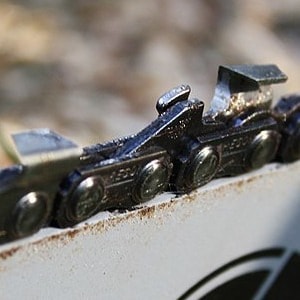 Cleaning the chain can be a bit more complicated than the bar. Most professionals recommend taking a bucket of ammonia and water and soaking the chain In the solution for about 15 minutes. I recommend 1 cup of ammonia and 1 gallon of water.
Before dunking your hands into this mixture, I suggest putting on a thick pair of rubber gloves. Then, you can use a toothbrush or another small cleaning tool to scrub each individual part of the chain until totally free of debris. There is an unbelievable amount of stuff that gets stuck in the small pieces of the chain while cutting wood.
After the chain is clean, give it a good rinse to remove the ammonia and then dry the chain to get all the moisture out. Now it is time to get the chain nice and lubricated. Find a small tray and fill it with enough chain oil that you can submerge the entire chain for about 3 hours.
After you’ve removed the chain from the oil, dry it with a paper towel and you have a brand-new and sparkling-clean chainsaw chain.
Step 3: Clean the Powerhead
The powerhead is the large piece of the machine that connects to the bar. Stuff can build up on the powerhead over time and it is relatively easy to wipe off with a dry cloth. Then use a small cleaning tool, like a toothbrush or a paintbrush, to get the dirt out from around the crankcase, the bar studs, and the clutch drum.
Make sure there is no dirt jamming any of the small spaces between components. If any seriously thick gunk has gotten stuck, you can pick it off with a screwdriver or a thin scraping tool.
Read More: Chainsaw Maintenance – The Ultimate Guide
Step 4: Clean the Air Filter & Spark Plugs (Gas Chainsaws Only)
These two steps are only for gas chainsaws. The air filter is undoubtedly the most important part inside your chain saw that needs to stay clean, as a dirty or clogged air filter can hamper the power of your chainsaw and reduce its performance.
While cleaning the air filter is a good idea, you can also just change it. Take the air filter out and give it a good look. If it isn’t too dirty, wipe with a soft brush to get all the dust and debris out of it, and then put it back.
If it is seriously dirty, run it underwater and try to pull the big particle pieces out. Just make sure you let it dry before putting it back in. Alternatively, just throw the air filter in the garbage and buy a new one.
You must remove the top cover to access the spark plug. Then you will need to unscrew and remove the plug to inspect it. Take a look at the electrodes. If they are dark brown, you have no issues with your spark plug. However, if they look burned and black, or if they appear to be chipped, you need to replace the plug sooner rather than later.
If your spark plug looks like it’s in bad shape, I recommend pausing the cleaning process to go change it out. Take the spark plug with you to a hardware store and they will match it with a replacement.
Step 5: Reassemble
The only thing left to do now is reassemble the chainsaw. I hope you remember what pieces went where, and what tools you used to take it apart. Once everything is reassembled, you should have a 100% clean chainsaw that you can be proud of.