 Keeping your chainsaw chain tight is absolutely critical if you want your tool to perform its job properly. In fact, you should always check the tension of your chain before getting to work. And throughout the job, you should be regularly checking the tension of your chain.
If the chainsaw chain becomes loose, it dramatically increases the risk of kickback. If there is a violent and unexpected kickback, and you are not prepared for it, it can result in injury. It is incredibly important that the chain remains properly tensioned.
If the chain becomes too loose, it can also be thrown off the guide bar. This is a huge pain because you will need to take apart the chainsaw and fix the chain yourself. This can result in lost time and increased stress.
If the chain is too tight, you can get a whole different type of problem. A chain that is too tight can stop the chainsaw from working at all because the chain won’t rotate properly over the guide bar. The chainsaw could heat up exponentially because of this, which becomes a fire hazard and a safety hazard.
To keep your chainsaw in proper working condition, and to keep yourself safe during operation, it is absolutely critical to have the proper chain tension. In today’s guide, I will teach you all about proper chain tension and how to operate your tool safely.
How to Adjust the Chain Tension
Before we get started, it is absolutely important that the engine is turned off before you begin playing with the tension on your chainsaw. You never want to work with a running tool. You also want to allow the chainsaw to cool down before you start playing with the tension. Never adjust the tension while the chainsaw is hot.
Also, keep in mind that this is a rough guide. To properly adjust the chain tension on your chainsaw, it is important that you consult the operator’s manual. Many chainsaws are different, but the individual manual for your particular chainsaw is going to have all the accurate information.
Step 1: Locate Adjustment Point
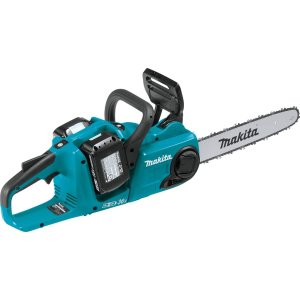 The first thing you need to do is find the adjustment point. Many chainsaws come equipped with easy tensioning systems. In fact, some chainsaws have chain tensioning systems that you can use without tools. Many of these systems are mounted on the side of the chainsaw and require very little effort.
Some adjustment points are housed inside the side cover and must be accessed through a release nob. On other machines, there is an adjustment screw that can be accessed from the exterior of the machine so that you can tighten the chain with nothing but a screwdriver and a wrench.
The first step to tightening the chain is to figure out what system your machine uses and where the adjustment point is located.
Read More: How To Measure A Chainsaw Bar – All You Need To Know
Step 2: Adjust the Tension
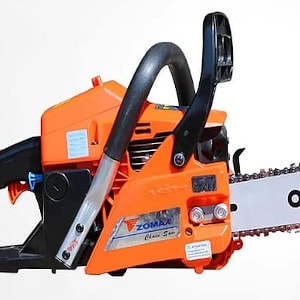 For the sake of the majority, we are going to talk about chainsaws that come with a tension screw. If you look straight down the length of the bar, you will see a small screw on the lower right side next to the base of the bar. That is your tension screw.
To get the correct tension, you first need to loosen the cover nuts that hold the bar securely in place. These are the two nuts on the left side of the machine holding the housing over the bar and the powerhead. You don’t have to take the whole covering off, you only need to loosen the nuts.
The reason you loosen the nuts is that adjusting the tension of the chain requires more than just getting the chain tight. You are also adjusting the bar of the chainsaw outward, and so the bar must be flexible. For this, the nuts must be loose.
Once the nuts are loose, you need to pinch the nose of the bar with two fingers and lift it up slightly. At the same time, you are going to screw the tension screw clockwise until there is no slack in the chain. Once the chain is securely in the bar, you can release the bar and tighten the cover nuts again.
Read More: Chainsaw File Sizes – Determine Which One You Need
Step 3: Snap Test
 Now you need to test to make sure the chainsaw tension is perfect. You can also do this prior to tightening the chain as a way to see if it really does need to be tightened.
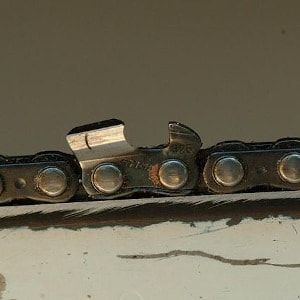
With the chainsaw off, and a quality pair of gloves protecting your fingers, all you need to do is hold the chainsaw with one hand and pinch the chain with two of your fingers from your other hand. You must pinch the chain in the center of the bar on the top side.
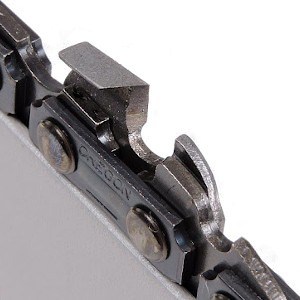
This is why it is called the snap test. With the chain pinched between your two fingers, you want to lift the chain away from the bar and then let it go. This will cause the chain to snap back into the bar. If the chain has the proper tension, it will snap quickly back into place and there will be no sagging or delay.
Alternatively, you will know the chain is loose if it falls slowly into position or if there is any sagging on the bottom part of the bar. If this is the case, you must go through these steps again to adjust the chain accordingly.
This is a great test to do in the middle of the operation, but just remember the chain is going to be super hot. Always use protective gloves, and it is highly recommended that you wear eye protection in case something flies into your eyeball while doing the snap test.
As a side note, you may need to adjust the chain more than once throughout the day. If you are working far from home or on the outskirts of your property, I would highly recommend bringing with you the adjustment tool so that you can quickly make chain adjustments at any time.