 Nothing is more annoying than when your chain falls off your chainsaw. This can happen for a number of reasons, and it is not as uncommon as you may think. But, if you are not a machine expert, you may not know how to put a chain on a chainsaw. And if your chain falls off, you may be staring at it extremely confused.
But don’t worry, today we will look at how to equip a chainsaw chain yourself in a few easy steps. One of the most important aspects to putting a chain on a chainsaw is knowing which way the chain goes. Once you have figured out which direction the chain is supposed to go, then you can figure out how to get it on the bar.
Today we will go through all the important steps to getting your chainsaw up and running very soon. First, why did your chain fall off your chainsaw?
Why Did My Chainsaw Chain Fall Off?
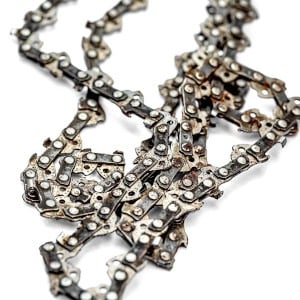 There are a few main reasons why your chain may have fallen off your chainsaw. One of the biggest contributors to a fallen chain is overheating. Sometimes the chain can overheat, and this can cause it to grow slightly in its length, become loose, and fall off your chainsaw altogether.
Another big reason is that you have not bothered to tighten the chain tension. If you have been running the chainsaw for quite some time without paying attention to the chain tensioner, your chain probably got loose and then fell off. This is not uncommon. Always remember to keep an eye on the tension of your chain.
The third reason is that a piece of wood may have jammed your chain, and this would have caused the chain to come out of the bar. This often happens when cutting through softwood, as sometimes chunks can get stuck underneath the chain.
The final reason is that the screws may have come loose. There are special screws that keep the chain fastened to the bar on most models of chainsaw, and if these screws are useless or unstable, the chain may have fallen off.
The good news is that we will now learn exactly what steps to take when fixing a fallen chain or putting a new chain onto your chainsaw.
Read More: Chainsaw Chain Sizes Chart – Chains Explained
Tools Needed for Installing Chainsaw Chain
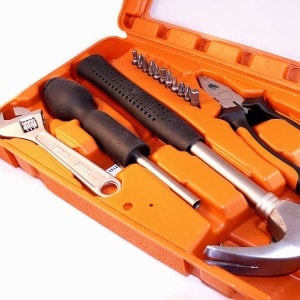 It is time to gather your tools. You should definitely have gloves and a long-sleeved shirt for safety, and also safety glasses. Gather a ½” wrench or a crescent wrench, a small hammer, and it is always handy to have a screwdriver around. You may also want a piece of cardboard to lay all the greasy pieces down on so that you don’t stain your floor. A piece of Cardboard is also handy, so you don’t lose any of the small components during disassembly and reassembly.
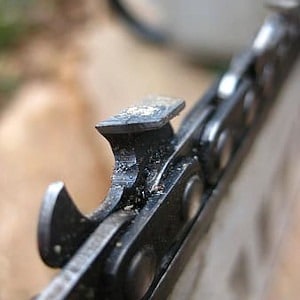
Before you begin putting the chain on the chainsaw, it is important to know which direction the chain needs to face. The cutter will always face forward, toward the direction of the end of the chainsaw bar. The cutter is the sharp piece that cuts the wood, and it is very hard to miss while looking at the chain.
The drive link will also face forward in the same direction of the cutter, and the drive link looks sort of like a metal wave. The guide, which sits in front of the cutter, will face in the backward direction. Basically, when you place the chain on the chainsaw, make sure the cutter and the drive link are both pointed forward to the end of the bar.
Read More: How To Sharpen A Chainsaw – Beginner’s Guide
Step 1: Disassembly
The first step is to disassemble everything. You need to loosen the tension screw so that the chain becomes loose and will come off. The tension screw is usually located at the base of the bar.
Then you need to unscrew the two nuts on the side of the chainsaw and take off the main housing. This will reveal the guts of the machine, and with the bar nuts removed you can easily take off the bar and the chain.
Step 2: Clean First
The second step is to quickly clean the parts of the machine. If you are removing an old chain, fixing a chain that has fallen off, or putting a new chain on, you can still quickly clean the components. To do this, simply use a small brush to remove the dust and dirt, then use oil to clean the parts with a rag.
Before you put the new chain on, make sure that you grease it.
Read More: How To Replace A Chainsaw Chain – 3 Easy Steps
Step 3: Put the Chain On
You must align the chain with the grooves that are on the bar, and you must do this while securing the chain to the sprocket. The sprocket is the wheel behind where the two bolts secure the bar to the powerhead. Wind the chain around the sprocket and make sure it fits nicely into the grooves of the bar.
This may sound complicated, but once you start it will be easy. The chain is designed to fit perfectly into the bar, and so you won’t have much difficulty. You also need to make sure that the tension stud is perfectly lined up with the guide hole.
With the chain attached to the bar and sprocket, you should pull the chain until you get the tension you want. Then you can put the housing back on and tighten the screws and nuts by hand.
Once the housing is back on, check your tension again. You can easily use the chain tension screw to get the tension perfect. Remember not to have it too tight or too loose.
When everything is perfect, do a final tighten with your wrench so that the nuts and screws are firmly holding all the pieces where they need to be. Now you are ready to test the chainsaw. If your chainsaw cuts well, you have no problems. If the chain feels too loose or too tight, simply adjust the screw until you get it right.
Read More: Chainsaw Chain Direction – How To Put It The Right Way